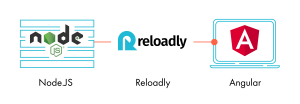
 Reloadly connects to Angular from Node.js
Angular is a framework that most developers deem seamless, efficient, and easy. Given its recent rise in popularity for everything from lightweight mobile applications to heavy-duty SaaS systems, we thought it’d be a good opportunity to delineate some ways that you can use it with Reloadly.
In this tutorial, we’ll go over how to build a simple Angular front-end project. In order to connect with Reloadly, however, you’re going to need a backend. You can use Node.js for this purpose.
How to Connect Reloadly’s API to Angular

Steps
- Install Angular on your machine (or ensure it is installed).
First, start by installing Homebrew. Homebrew is a package manager for MacOs and Linux. If you’re using Windows, this step is optional.
Installing Homebrew enables you to install Node.js. Homebrew eases the pain of package management and is the recommended route for installation. It also contains all the files you’ll need to work with Node.js, Reloadly, and Angular.
Once Homebrew is installed, enter the following command in your terminal or command prompt:
$ brew install node
Installing Node.js took more than thirty minutes on our end. Once it is on your system, enter the following command in your terminal or command prompt to get Angular.
$ npm install -g @angular/cli
Angular’s command line keyword is ng. You may need to run your terminal or command prompt as an administrator to proceed with Angular’s installation.
- After Homebrew, Node.js, and Angular are installed, we can get to instantiating a project.
Creating Your First Reloadly Angular Project
Use the following commands to start a project:
$ ng new reloadlyproject
$ cd reloadlyproject
Be sure to include only alphanumeric letters or dashes in the project name. For this example, we’ve named our project “reloadlyproject”, but you can provide a name that is meaningful to you.
The server location for Angular applications defaults to port 4200 (http://localhost:4200/).
Use the following command to compile your project:
$ ng serve
Projects are set to auto-compile on modification. This can be changed in the settings option.
Navigate to the directory of your project (for example, src\app ) and you will see the component and module files that were created on project start.
According to Angular, “A component controls a patch of screen called a view. You define a component’s application logic—what it does to support the view—inside a class. The class interacts with the view through an API of properties and methods.”
Angular modules are referred to as NgModules. Modules are, “containers for a cohesive block of code dedicated to an application domain, a workflow, or a closely related set of capabilities. They can contain components, service providers, and other code files whose scope is defined by the containing NgModule. They can import functionality that is exported from other NgModules, and export selected functionality for use by other NgModules.”
Sources: https://angular.io/guide/architecture-modules and https://angular.io/guide/architecture-components
For more information on modules and components, see Angular’s architecture documentation here.
- Next, begin coding your simple application.
Using Node.js to Call Reloadly’s API
You can use the HTTPS library in Node.js for calling Reloadly. For more on this library, visit Node.js’s documentation.
For Sandbox, you’re going to need an Auth token. You can get one by signing up for Reloadly. Once signed up, you will receive a Client ID and Client Secret.
You can use any API tool to generate your auth token. This page contains examples for cURL and Postman for getting your token from https://auth.reloadly.com/oauth/token. Additionally, you can generate your auth token programmatically.
With your bearer token in hand, you’re ready to make requests to Reloadly’s robust API. For this example, we’ll use the operators endpoint.
In order to connect with Reloadly’s API, you need a backend. This is because, for security reasons, CORS (cross-origin resource sharing) policy does not allow Access-Control-Allow-Origin.
Here’s where you have to integrate with Node.js, which is merely an example. You can use any backend that you’re familiar with for this exercise. For more details on how to do that, please contact us.
When running your program, you should see a collection of operators like below:
"content": [
        {
            "operatorId": 340,
            "name": "9Mobile Nigeria (Etisalat)",
            "bundle": false,
            "denominationType": "RANGE",
            "senderCurrencyCode": "USD",
            "senderCurrencySymbol": "$",
            "destinationCurrencyCode": "NGN",
            "destinationCurrencySymbol": "?",
            "commission": 2.0,
            "internationalDiscount": 2.0,
            "localDiscount": 0.0,
            "mostPopularAmount": 15,

            "country": {
                "isoName": "NG",
                "name": "Nigeria"
            },
Connecting the Reloadly Response to Angular
To grab the response object and inject it into the UI, navigate to the component’s HTML file and add paragraph tags. Then, add a button to call the GET method.
<title> Reloadly</title>
<p>
  Click the button to get Reloadly operators.
</p>
<hr />
<button class="button" (click)="getOperator()">Click</button>
<div>
    <p> {{ operator?.name }} </p>
</div>
In the component’s CSS file, include a simple block for styling the button and div.
div {
  padding: 2px;
  text-align: center;
}

button.button {
    background: transparent;
    border: 2px solid #000;
    padding: 5px;
}
And that’s it! You’ve created your first Angular application with Reloadly’s API. Clicking the button will call the API and populate JSON property data in the div.
Building a web application with Reloadly, Node.js and Angular is simple, intuitive, and seamless. The only question that remains is, what will you build?
Sign-up to get your free API Keys


